Vermehrungs-Blog - Juli 2022

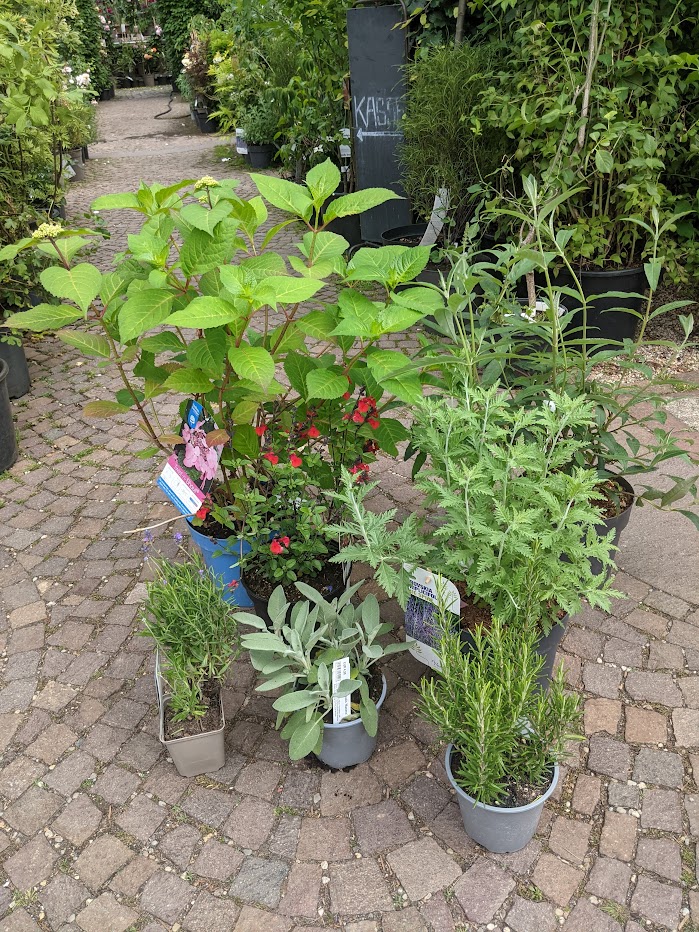
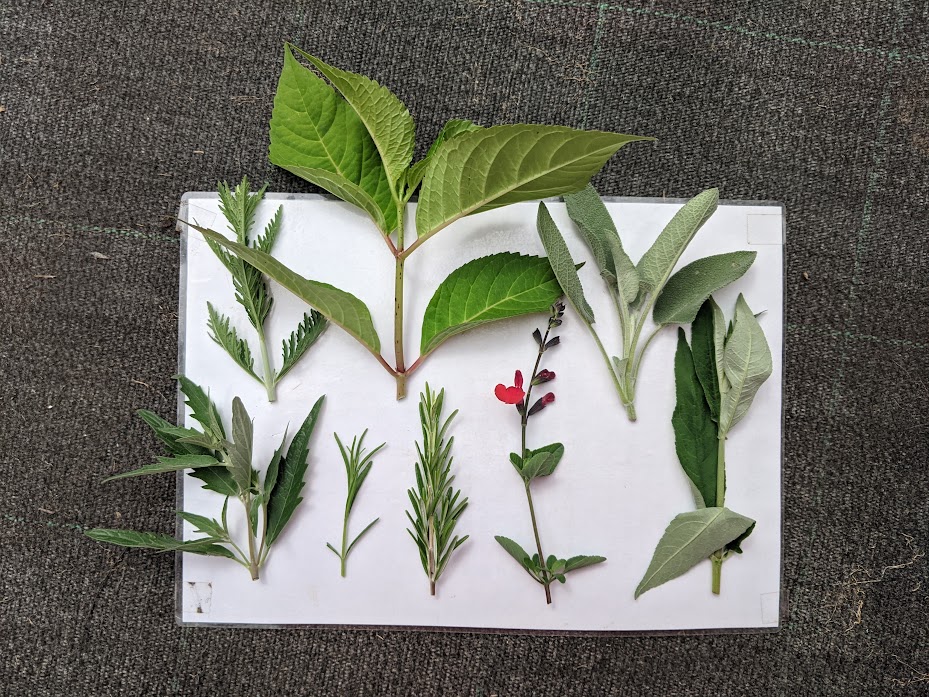
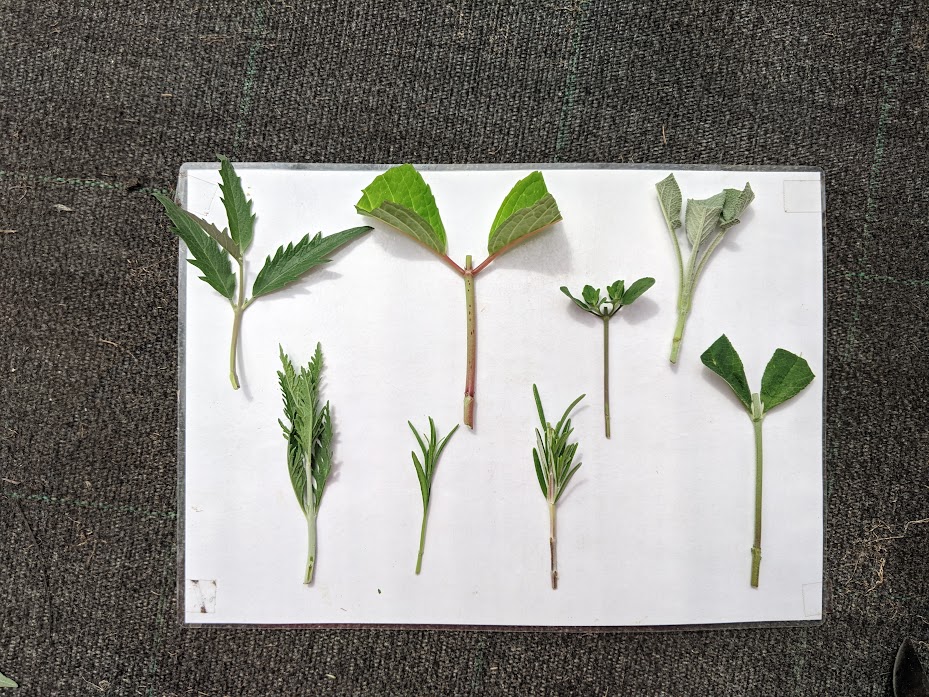
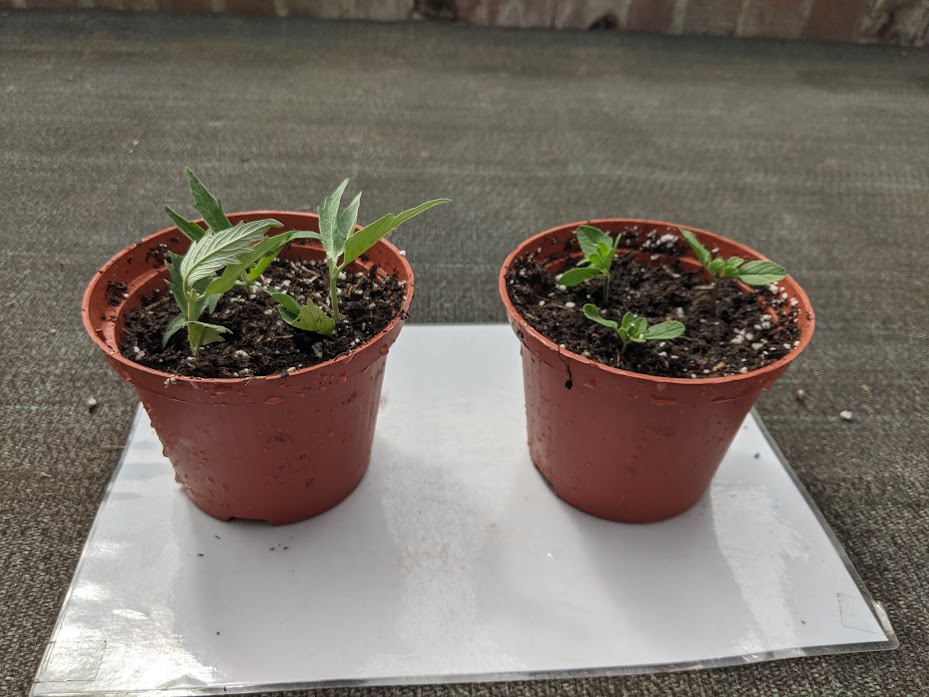
Stecklingen von Ihrer der Lieblingspflanzen in Ihrem Garten zu nehmen ist eine einfache und befriedigende Methode, um neue Pflanzen für Ihren eigenen Garten zu gewinnen oder an Freunde weiterzugeben. Stecklinge können zu jeder Zeit des Jahres auf verschiedene Weise geschnitten werden. Am einfachsten und erfolgreichsten sind jedoch Weichholzstecklinge, die von Mitte des Frühlings bis zum Frühsommer genommen werden sollten. Wie der Name schon sagt, ist das Pflanzenmaterial für diese Stecklinge das weiche, biegsame neue Wachstum des Jahres, das noch nicht zu einer verholzten Form abgehärtet ist. Wenn man diese Stecklinge im Juli nimmt, hat man genügend Zeit, um im Sommer und Herbst ein gutes Wurzelsystem zu entwickeln, so dass die neuen Pflanzen den Winter überstehen und im nächsten Frühjahr in den Garten gepflanzt werden können. Weichholzstecklinge können zur Vermehrung von Laubgehölzen wie Buddleja, Fuchsia, Salvia, Hydrangea, Lavatera, Perovskia, Caryopteris und Lavendel verwendet werden. Diese Technik eignet sich auch hervorragend für die Vermehrung von zarten Stauden wie Pelargonium, Penstemon und Verbena sowie für Kräuter wie Rosmarin, Salbei und Thymian.

Die Stecklingsvermehrung aus Weichholz ist relativ schnell, einfach und macht Spaß und kann zur Vermehrung vieler Pflanzensorten verwendet werden. Wenn Sie erst einmal das Vergnügen haben, mit Ihren ersten ausgewählten Sorten erfolgreich neue kleine Pflanzen zu produzieren, werden Sie sich in Ihrem Garten garantiert nach der nächsten Pflanze umsehen, von der Sie Stecklinge nehmen können. Es ist auf jeden Fall eine Technik, mit der es sich zu experimentieren lohnt und die süchtig machen kann!

Propagation Blog – July 2022

Taking cuttings from the favourite plants in your garden is a simple and satisfying way to produce new plants for your own garden or to pass on to friends. Cuttings can be taken at any time of the year in a variety of ways, but the easiest and most successful type is softwood cuttings which should be taken from mid-spring to early summer. As the name implies, the plant material used for these cuttings is the soft, flexible new growth produced this year which has not yet hardened into a more woody form. Taking these cuttings in July will give plenty of time for a good root system to develop over summer and autumn, allowing the new plants to survive the winter, ready for planting out into the garden early next spring. Softwood cuttings can be used to propagate deciduous shrubs such as Buddleja, Fuchsia, Salvia, Hydrangea, Lavatera, Perovskia, Caryopteris and Lavender. The technique is also great for producing new plants of more tender perennials such as Pelargonium, Penstemon and Verbena and for herbs such as Rosemary, Sage and Thyme.

Taking softwood cuttings is relatively quick, easy and fun and can be used to propagate from many plant varieties. Once you have the satisfaction of successfully producing new little plants with your first chosen varieties I guarantee you‘ll be looking around your garden for the next plant to take cuttings from. It is a certainly a technique worth experimenting with and can become quite addictive!

Pflanzen für die Vermehrung

Tipps für die Entnahme von Stecklingen aus Weichholz von Ihren Gartenpflanzen ...

Um die besten Chancen auf Erfolg mit Weichholzstecklingen zu haben, ist es wichtig zu wissen, welche Art von Trieben man von der Mutterpflanze nehmen muss. Bei Weichholz handelt es sich weder um das neue, grüne Wachstum am Ende eines Triebs noch um das steife, verholzte Wachstum in der Nähe der Stammbasis, sondern um das Wachstumsstadium, das zwischen diesen beiden liegt. Die beste Methode, um zu prüfen, ob sich ein Trieb im Weichholzstadium befindet, ist, ihn zu biegen. Wenn der Trieb knickt, handelt es sich um Weichholz und ist das richtige Material für die Verwendung. Wenn der Trieb sehr weich und biegsam ist und sich lediglich biegt, ist er zu grün. Wenn der Trieb überhaupt nicht biegsam ist, ist er zu verholzt.


Methode zur Entnahme von Weichholzstecklingen -

1) Füllen Sie einige kleine Töpfe mit Blumenerde, die mit etwa 30 % eines Materials wie Perlit oder feinem Splitt gemischt ist, um eine gute Drainage zu gewährleisten. Gut wässern und abtropfen lassen.

2) Entnehmen Sie die Stecklinge früh am Tag, wenn die Stämme noch voll hydratisiert sind. Vermeiden Sie dünne, schwache Triebe und alles, was zu dick und schwer ist. Legen Sie die Stecklinge in eine mit feuchten Papiertüchern gefüllte Plastikschüssel oder -tüte, um sie vor der Sonne zu schützen und feucht und kühl zu halten, und verwenden Sie sie so bald wie möglich.

Tips for taking softwood cuttings from your garden plants ..

For the best chance of success with softwood cuttings it is important to understand what type of shoot to take from the parent plant. Softwood material is neither the new, green growth at the end of a shoot, nor the stiff, woody growth near the base of the stem, but is the stage of growth which lies between the two. The best method to test whether a shoot is at the softwood stage is to bend it. If the stem snaps, it is softwood and is the right material to use. If the shoot is very soft and flexible and merely bends, then it is too green. If the shoot is not flexible at all then it is too woody.


Method for taking softwood cuttings –

1) Fill some small pots with potting compost mixed with around 30% of a material such as perlite or fine grit to ensure good drainage. Water well and leave to drain.

2) Take cuttings early in the day, when the stems will be fully hydrated. Avoid thin, weak shoots or anything that is too thick and heavy. Place the cuttings in a plastic bowl or bag filled with damp paper towels in order to keep them out of the sun and moist and cool and use them as soon as possible.

frisch geschnittene Stecklinge

3) Schneiden Sie mit einer sauberen Gartenschere oder einem scharfen Messer ein 5-10 cm langes Stück des Stängels knapp unterhalb eines Blattansatzes ab. Behandeln Sie die Stecklinge sehr vorsichtig und halten Sie sie vorzugsweise an einem Blatt fest, um eine Beschädigung des Stiels zu vermeiden.

4) Entfernen Sie alle Blätter von der unteren Hälfte des Stecklings. Dadurch werden Wunden am Trieb freigelegt, aus denen die Wurzeln austreiben werden. Schneiden Sie die Triebspitze ab und entfernen Sie alle Blütenknospen. Schneiden Sie große Blätter von Pflanzen wie Hortensien ab, um den Wasserverlust des Stecklings während der Wurzelbildung zu verringern.

3) When taking a cutting, use a clean pair of secateurs or sharp knife and take a 5-10cm length of stem, cutting just below a leaf joint. Handle the cuttings very gently, preferably holding them by a leaf to avoid any damage to the stem.

4) Remove all leaves from the lower half of the cutting. This opens up wounds on the shoot, which are the areas from which the roots will emerge. Pinch out the growing tip and remove any flower buds. Trim large leaves from plants such as Hydrangea in order to reduce water loss from the cutting whilst it is forming roots.

Vorbereitete Stecklinge

5) Wenn Sie Hormonwurzelpulver haben, können Sie das Schnittende leicht damit bestreichen, um die Wurzelbildung zu fördern und das Risiko einer bakteriellen Infektion zu verringern. Machen Sie sich keine Sorgen, wenn Sie kein Bewurzelungspulver haben, denn Sie sollten auch ohne dieses eine gute Erfolgsquote haben.

6) Stechen Sie mit einem Spatel oder Bleistift ein Loch in den Kompost und setzen Sie den Steckling so ein, dass das unterste Blattpaar knapp über der Erdoberfläche liegt. Verdichten Sie den Kompost um den Steckling herum. In jeden Topf kann mehr als ein Steckling gesteckt werden, aber nicht zu dicht, denn es ist wichtig, eine gute Luftzirkulation um jeden Steckling zu gewährleisten, um die Entwicklung von Krankheiten zu verhindern.

5) If you have hormone rooting powder the cut end can be lightly covered with this to encourage root formation and reduce the risk of bacterial infection. Don‘t worry if you don‘t have any rooting powder because you should still have a good success rate without it.

6) Use a dibber or pencil to make a hole in the compost and insert the cutting so that the lowest pair of leaves is just above the soil surface. Firm the compost around the cutting. More than one cutting can be put into each pot, but don’t crowd the pot too much, because it is important to maintain good air circulation around each cutting to prevent the development of disease.

7) Bis die Stecklinge Wurzeln schlagen, ist es wichtig, sie vor dem Austrocknen zu bewahren. Dies geschieht am besten, indem man den Topf mit einer Plastiktüte abdeckt oder in ein Zimmergewächshaus mit Deckel stellt. Das Zimmergewächshaus sollte so eingestellt sein, dass die Bodenwärme zwischen 18 und 24 °C liegt. Stehen die Töpfe nicht in einem Zimmergewächshaus, sollten sie an einem Ort mit hellem, aber indirektem Licht aufgestellt werden. Nehmen Sie den Deckel des Zimmergewächshauses oder den Plastikbeutel alle 2 bis 3 Tage für 10 Minuten ab, um für eine gewisse Belüftung zu sorgen, und schütteln Sie dann überschüssiges Wasser aus dem Plastikdeckel oder -beutel, bevor Sie ihn wieder aufsetzen.

7) Until the cuttings develop roots it is important to make sure they don’t dry out. The best way to do this is to cover the pot with a plastic bag or to put it inside a lidded propagator. The propagator should be set to provide bottom heat between 18-24 C. If the pots are not in a propagator they should be placed somewhere with bright, but indirect light. Remove the propagator lid or plastic bag for 10 mins every 2 to 3 days to provide some ventilation and then shake off any excess water from the plastic lid or bag before replacing it.

8) Die Wurzeln entwickeln sich je nach Art unterschiedlich schnell, aber es wird wahrscheinlich 4-6 Wochen dauern, bis sie gebildet sind. Seien Sie geduldig und lassen Sie sich nicht dazu verleiten, die Stecklinge herauszuziehen, um nach Wurzeln zu suchen, da dies die kleinen Wurzeln, die sich gebildet haben, beschädigen würde. Prüfen Sie stattdessen die Unterseite des Topfes, wo neue Wurzeln aus den Drainagelöchern hervortreten können.

Sobald sich ein gesundes Wurzelgeflecht gebildet hat, ist die kleine Pflanze selbständiger und die Abdeckung kann entfernt werden. Die kleinen Pflanzen können in größere Gefäße umgetopft werden, um weiter zu wachsen. Durch regelmäßiges Füttern und Ausstechen der Triebspitzen wird sichergestellt, dass sich die neuen Pflanzen zu gesunden, buschigen Exemplaren entwickeln, die im nächsten Frühjahr an ihren endgültigen Standort im Garten ausgepflanzt werden können.


Diesen Monat bei der KGA ...

Die Aussaat der einjährigen Zierpflanzen ist nun abgeschlossen und alle Setzlinge werden in ihre kompostierbaren 1-Liter-Behälter eingetopft und zum Verkauf angeboten. Es ist die Zeit des Jahres, in der ich beginne, meine Aussaat- und Topfregister durchzusehen und mir Notizen zu machen, die mir bei der Planung für das nächste Jahr helfen. Der Zeitpunkt der Aussaat und des Umtopfens der Setzlinge kann immer wieder geändert werden, um sicherzustellen, dass die Samen optimal keimen und die Pflanzen zum richtigen Zeitpunkt in den Verkauf gelangen. Da ich in jeder Saison neue Sorten ausprobiere, ist es gut zu beobachten, wie lange die Samen zum Keimen brauchten und wie schnell die kleinen Sämlinge zu etablierten Pflanzen heranwuchsen, die für den Verkauf bereit waren. Zwei der diesjährigen neuen Sorten, von denen ich besonders begeistert bin, sind das blauäugige Afrikanische Gänseblümchen (Arctosis venusta) mit seinem attraktiven silbrigen Laub und der hübschen hellvioletten Blüte mit blauem und gelbem Auge und Clarkia elegans, die eine Mischung aus schönen weißen, dunkelrosa und blassrosa Blüten hervorbringt, die sowohl einfach als auch gefüllt sein können. Ich werde in der nächsten Saison auf jeden Fall größere Partien dieser beiden Pflanzen anbauen und natürlich in Saatgutkatalogen stöbern, um zu sehen, welche aufregenden neuen Sorten ich in der nächsten Saison in unser Angebot aufnehmen kann.


Dr. Catherine Thorpe

8) Roots develop at different rates depending on the species, but will most likely take 4-6 weeks to form. Be patient and don’t be tempted to pull the cuttings out to check for roots, because this will damage any small roots which have formed. Instead, check the underside of the pot, where new roots can be seen emerging from the drainage holes.

Once a healthy network of roots has been established the small plant will be more self-sufficient and the cover can be removed. The small plants can be potted up into larger containers to grow on. Regular feeding and pinching out of growing tips will ensure your new plants develop into healthy, bushy specimens which can be planted out into their final growing position in the garden early next spring.


This Month at the KGA …

Sowing seeds for the annual ornamental varieties has now come to an end and all the seedlings are potted up into their 1L compostable containers and put out for sale. It is the time of year when I begin to look back through my sowing and potting records and make notes to help me plan for next year. There are always changes which can be made to the timing of seed sowing and the potting on of seedlings to make sure that the seeds germinate optimally and the plants get to the point of sale at the correct time. Since I always try out new varieties each season it is good to note how long the seeds took to germinate and how quickly the small seedlings took to grow into more established plants ready for sale. Two of this years new varieties which I am particularly excited about are the blue-eyed African Daisy (Arctosis venusta), with its attractive silvery foliage and pretty palest purple daisy flower with a blue and yellow eye and Clarkia elegans which produced a mix of beautiful white, dark pink and pale pink flowers, both single and double in form. I will definitely be growing larger batches of both of these plants next season and of course exploring seed catalogues to see what exciting new varieties I can add to our selection on offer next season.


Dr Catherine Thorpe